Local Food Sandusky

Harvest Vision: Consume Quality – Demand Local.

Archive for January 2009

Backyard Gardens: Soil and Compost Basics

with 5 comments

As long as you have access to sunlight, water, and soil, your own food plot is possible, to either use for yourself or share with friends and neighbors. However, even with our region’s reputable soil, it is not a bad idea to get your soil tested. Understanding the condition of your soil and water supply can help you forsee potential risks for diseases and pests. A decent soil test can be done for only $25 and will measure the soil pH, organic matter and nutrient levels, and information on how to treat micronutrient deficiency in order to prepare your soil to grow perfectly nutritious food. Soil deficiency and degradation can be caused by erosion, over fertilization, and/or pollution.

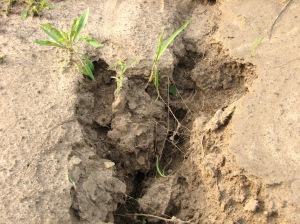
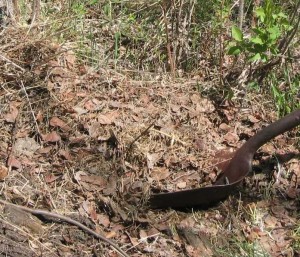
Soil erosion can be caused by irresponsible land management practices.

Soil erosion can be caused by irresponsible land management practices.

Soil pH is an important part to the development of vegetable plants. The pH is a measure of the acidity or alkalinity of a substance. The pH scale is a range from 1 to 12, with 1 being the most acidic and 12 being the most alkaline or basic. Either extreme can be toxic. Room temperature drinking water, for example, should have a balanced measurement of 7. There are several reasons why gardeners and farmers, alike, should consider their soil pH.

  • Certain plants and soil life forms (like good bacteria, arthropods, earthworms) prefer specific conditions.
  • Some plant diseases and pests tend to thrive when the soil is either alkaline or acidic.
  • The pH can affect the availability of nutrients in the soil. Slightly acidic soil increases the concentration of nutrients potassium (K), magnesium (Mg) and calcium (Ca), which are necessary for plant life.

Vegetables flourish in well-drained soil that is rich in organic nutrients and measures a little on the acidic side of the pH scale. In fact, the preferred pH for almost all vegetables is between 5.5 to 6.5 pH. Here is a list of various vegetables and their preferred pH.

The pH scale.

The pH scale.

The cheapest way to add nutrients to your soil is by composting. The How To Compost website offers excellent information about composting and pages of tips, tricks and products to help making the process easier. However, you can make it and use it without spending any extra money. Here are some paraphrased explanations and recommendations from their site for first-time composters who want to know more about the process.

Why Compost?

Compost is one of nature’s best mulches and soil amendments and you can use it instead of commercial fertilizers.  Using compost improves soil structure, texture, and aeration and increases the soil’s water-holding capacity. Compost loosens clay soils and helps sandy soils retain water. Adding compost improves soil fertility and stimulates healthy root developments in plants. The organic matter provided in compost provides food for microorganisms, which keeps the soil in a healthy balanced condition.  Soil organisms produce compounds that enhance the growth of plants. The symbiotic relationships within this ‘living soil’ cycles nutrients, enhances soil structure, which improves optimal water and air movement in topsoil. Nitrogen, potassium, and phosphorus will be produced naturally by the feeding of microorganisms, so few if any soil amendments will need to be added.

Most gardeners have long understood the value of this rich dark earthy material in improving the soil and creating a healthful environment for plants. Balanced soil biology will protect your plants from disease. Understanding how to make and use compost is in the public interest, as the problem of waste disposal climbs toward a crisis level. Landfills are brimming and new sites are not likely to be easily found. For this reason, there is interest in conserving existing landfill space and in developing alternative methods of dealing with waste. Our hands are being forced to deal creatively with our own yard waste, as one by one, cities are trying to cut costs by eliminating programs to haul off our leaves and grass clippings. About one third of the space in landfills is taken up with organic waste from our yards and kitchens, just the type of  material that can be used in compost. With a small investment in time, you can contribute to the solution to a community problem, while at the same time enriching the soil and improving the health of the plants on your property. Studies have shown that home composting can divert an average of 700 lbs. of material per household per year from the waste stream. Composting is an excellent way to avoid both wasting useful, natural resources and creating environmental problems, while at the same time producing a high quality and inexpensive soil amendment. Don’t throw away materials when you can use them to improve your lawn and garden – Start composting instead!

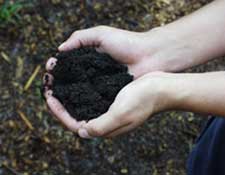
Rich, dark, earthy humus.

Rich, dark, earthy humus.

The Compost Decomposition Process

Compost is the end product of a complex food chain involving hundreds of different organisms, including bacteria, fungi, worms, and insects. What remains after these organisms break down organic materials is the rich earthy substance your garden will love. Humus is our goal when we start composting. Composting replicates nature’s system of breaking down materials on the forest floor. As your compost produces humus, it becomes a mixture of nutrients that have been broken down completely, allowing plants to absorb the benefits. Humus also physically keeps soil light and fluffy, optimal for growing plants. Some experts even suggest using soil from a wooded area (if available) to help start your compost pile.

By providing the right environment for the organisms in the compost pile, it is possible to produce excellent compost. We usually want to organize and speed up the process of nature, sometimes to it’s detriment. However, by knowing the perfect conditions of heat, moisture, air, and materials, we can speed up the composting process, aiding the energy cycle without harming the environment. Making the compost faster also creates heat which will destroy plants diseases and weed seeds in the pile, benefiting your garden with you in control.

Carbon and nitrogen are the two fundamental elements in composting, and their ratio (C:N) is significant. The bacteria and fungi in compost digest or “oxidize” carbon as an energy source and ingest nitrogen for protein synthesis. Carbon can be considered the “food” and nitrogen the digestive enzymes.

Composting can range from passive – allowing the materials to sit and rot on their own – to highly managed. Whenever you intervene in the process, you’re managing the compost. How you compost is determined by your goal. If you’re eager to produce as much compost as possible to use regularly in your garden, you may opt for a more hands-on method of composting.  If your goal is to dispose of yard waste, a passive method is your answer.

Passive Composting involveds the least amount of time and energy on  your part. This is done by collecting organic materials in a freestanding pile. It might take a long time (a year or two), but eventually organic materials in any type of a pile will break down into finished compost. More attractive than a big pile of materials sitting in your yard is a 3-sided enclosure made of fencing, wire or concrete blocks, which keeps the pile neater and less unsightly. Add grass clippings, leaves, and kitchen scraps (always cover these with 8 inches of other material). The pile will shrink quickly as the materials compress and decompose. Wait a year or two before checking the bottom of the bin for finished compost. When it is ready, shovel the bottom section into a wheelbarrow and add it to your garden beds. Continue to add greens (nitrogen) and browns (carbon) to have a good supply of finished compost ready. After the first few years, most simple piles produce a few cubic feet of finished compost yearly.

Consider the C:N Ratio, Surface Area, Temperature, Moisture and Oxygen Levels  in Your Compost Pile – It is EASY.

Managed composting involves active participation, ranging from turning the pile occasionally to a major commitment of time and energy. If you use all the techniques of managing the pile, you can get finished compost in 3-4 weeks. Choose the techniques that reflect how much you want to intervene in the decomposition process and that will be a function of how fast you want to produce compost. Experts have determined that the fastest way to produce fertile compost is to maintain a carbon to nitrogen ratio somewhere around 25 to 30 parts carbon to 1 part nitrogen. Deciding this ratio in your own yard isn’t as complicated as it may seem. Adding 3-4 pounds of nitrogen material for every 100 pounds of carbon should be satisfactory for efficient and rapid composting. [See chart below for examples of carbon and nitrogen sources that are appropriate for compost.] If decomposition is slow and your pile is dry, there is too much carbon. If your pile is particularly stinky and sloppy wet, then you have too much nitrogen. If you want to get technical with your carbon to nitrogen ratio, you can reference this equation.

The speed with which you produce finished compost will be determined by how you collect materials, whether you chop them up, how you mix them together, and so on. Achieving a good balance of carbon and nitrogen is easier if you build the pile all at once. Layering is traditional, but mixing the materials works as well. Shredded organic materials heat up rapidly, decompose quickly, and produce uniform compost. The decomposition rate increases with the size of the composting materials. If you want the pile to decay faster, chop up large fibrous materials yourself or with a wood chipper. You can add new materials on an ongoing basis to an already established pile. Most single-bin gardeners build an initial pile and add more ingredients on top as they become available.

The temperature of the managed pile is important – it indicates the activity of the decomposition process. The easiest way to track the temperature inside the pile is by feeling it. If it is warm or hot, everything is fine. If it is the same temperature as the outside air, the microbial activity has slowed down and you need to add more nitrogen (green) materials such as grass clippings or kitchen waste. Use a compost thermometer to easily measure the activity of your compost. They are inexpensive and quite convenient to have. The following information is for the highly managed pile and the optimum finished compost in the shortest amount of time. Decomposition occurs most efficiently when the temperature inside the pile is between 104 F or above 131 F. This keeps the pile operating at its peak. Most disease pathogens die when exposed to 131 F for 10-15 minutes, though some weeds seeds are killed only when they’re heated to between 140 F and 150 F. If weed seeds are a problem, let the pile reach 150F during the first heating period, then drop back down to the original temperature range. Be sure to only let this happen occasionally after adding materials to the pile. If you keep the temperature above 131F regularly, the decomposing microbes will be killed off. Simply turn the pile if it gets too warm.

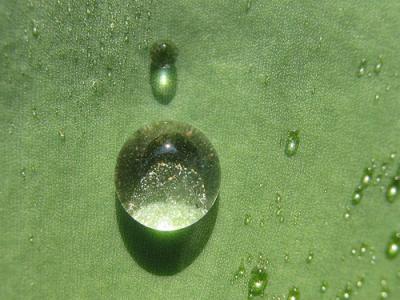
Water is necessary for plant life.

Water, sunlight, air, and nutritious soil are necessary for healthy plant life.

Organic waste needs water to decompose. If the pile becomes too dry , the decay process will slow down. The rule of thumb is to keep the pile as moist as a wrung-out sponge. If you’re building your pile with very wet materials, mix them with dry materials as you build. If all the material is very dry, soak it with a hose as you build. Whenever you turn the pile, check it for moisture and add water as necessary. Too much water is just as detriment as the lack of water. In an overly wet pile, water replaces the air, creating an anaerobic environment, slowing decomposition. 


Air circulation is an important element in a compost pile. Most of the organisms that decompose organic matter are aerobic, meaning they need oxygen to survive. There are several ways to keep your pile breathing. Try not to use materials that easily compacted such as ashes or sawdust without mixing them with a coarser material first. People who passively manage large piles often add tree branches or even ventilation tubes vertically into different parts of the pile to be shaken occasionally, maximizing air circulation. The most effective  way to re-oxygenate the pile is to turn the pile by hand, using a large garden fork. The object is to end up with the material that was on the outside of the original pile, resting in the middle of the restacked pile. This procedure aerates the pile and will promote uniform decomposition.

Compost Site Selection

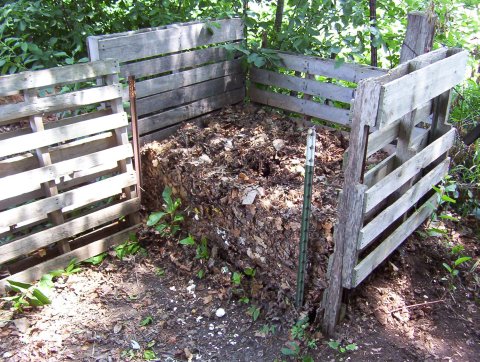
Compost bins can be made from old palettes, bricks, old trash cans and other recycled materials.

Compost bins can be made from old palettes, bricks, old trash cans and other recycled materials.

Any pile of organic matter will eventually rot but a well-chosen site can speed up the process. Look for a level, well drained area. If you plant to add kitchen scraps, keep it accessible to your back door. Don’t put it so far away that you’ll neglect the pile. In cooler latitudes, keep the pile in a sunny spot to trap solar heat. Look for some shelter to protect the pile from freezing cold winds which could slow down the decaying process. In warm dry altitudes, shelter the pile in a shadier spot so I doesn’t dry out too quickly. 

Build the pile over soil or lawn rather than concrete or asphalt to take advantage of earthworms, beneficial microbes, and other decomposers, which will migrate up and down as the seasons change. Having your compost on soil also allows for drainage. 

If possible, look for a spot that allows you to compost discretely, especially if you have neighboring yards in close proximity. Aim for a distance and visual barriers between the pile and the neighbors. In order to keep the area contained and organized, build a three-sided bin to keep your compost in. The locally focused minds at Haag Insight have some excellent guides for building compost bins, from stationary to rotating, as well as guides for managing indoor compostHere is another article for ideas on how to build compost containers out of old wooden pallets, wire mesh, recycled trash bins, or concrete blocks.

Seasonal Schedule for Composting

An effective storage system is the key to successfully using the materials each season provides. In the fall, collect and shred fallen leaves. The best use for them now is as mulch for trees, shrubs and garden beds. Excess leaves can be stored – leaves from 100 bags can be shredded and put in a 4’x4’x4′ container. Some decomposition will take place over the winter, but not a significant amount. Continue to put kitchen scraps in the pile, but it’s not necessary to turn in really cold seasons. If you want your compost pile to stay active during the winter, you’ll want an enclosed bin with insulated sides. A black bin situated in a sunny spot can help trap solar radiation during cold spells. Keep the pile as large as possible so that heat generated from decomposition will endure. You can also stack bales of straw along the sides of your bin to help retain the heat.

In areas with a cold winter, spring is the best time to start the compost pile. There’s an abundance of grass clippings and trimmings. Summer is the time the compost pile is working at its peak range of decomposition, especialy if it has been turned once or twice. Cover and store the finished compost, or use it and start another batch. With enough organic waste, you can produce several batches of highly managed compost during the summer.

What Can Go into Your Compost

The yard waste you can compost is mostly browns (carbon) and kitchen waste is mostly greens (nitrogen). A good rule of thumb is to not add animal-based ingredients to the kitchen waste destined for your compost pile.

Yard waste is primarily made up of brown materials

Yard waste is made up of mostly brown materials

Browns (Carbon)

  • Leaves/Straw/Dead Grass – Shred to break down faster
  • Wood Chips/ Sawdust – Add a lot of nitrogen materials to make up for this high carbon content; Don’t use too much and don’t use treated woods.
  • Pine Needles and Cones – Don’t overload the pile; decomposes slowly
  • Cardboard – Shred into small pieces if used; Moisten so it is easier to tear. If you have a lot, recycled some of it.
  • Cornstalks/Cobs – Best if shredded and mixed well with greens
  • Eggshells – Crush shells as they break down slowly
  • Newspaper – Shred it so it breaks down easier. It’s easy to add too much so remember to recycle if you have a lot. Don’t add slick color pages.
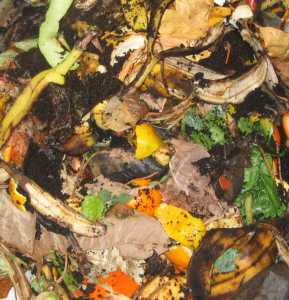
Food waste is made up of mostly green materials.

Food waste is made up of mostly green materials.

Greens (Nitrogen)

  • Algae, Seaweed, Lake Moss – Good source of nutrients and microorganisms
  • Coffee Grounds/Filters/Tea Bags – Worms love coffee grounds!
  • Recently Cut Grass
  • Vegetable Peelings, Salad and Fruit Scraps
  • Old Flowers or Spent Potted/Bedding Plants
  • Weeds – Make sure they are not seeding! Dry out on pavement before adding.

What CAN’T Go into Your Compost

  • Ashes from charcoal or coal – contains materials bad for plants like sulfur and iron
  • Dog/Cat droppings or litter – May contain disease organisms. Avoid!
  • Diseased Plants – If your pile doesn’t get hot enough, it might not kill the organisms. Avoid
  • Fish Scraps, Meat, Fat, Grease, Oils, Bones, Dairy – Avoid. Can attract rodents and cause a stinky pile!

Also, be advised that if you want to use animal manure to treat your soil, you should know the source. In 2007, a University of Minnesota study indicated that foods such as corn, lettuce and potatoes have been found to accumulate antibiotics from soils spread with animal manure that contains these drugs. If the animals were from feedlots that use antibiotic feed and/or hormone injection, then their waste adds these harmful substances to the energy cycle. It’s recommended that the herbivore animals’ diet should be 100% vegetable-based as to avoid potential outbreaks of harmful E. coli, listeria, and salmonella. Common manures used for gardening and agriculture include horse, cow, pig, sheep, goat, chicken, and rabbit.

How to Use Your Compost

  • As a Soil Amendment – Work in 2-3 inches of compost into top of 6-8 inches of soil when ground is warm and moist.
  • Vegetables – Amend soil with compost before planting. Side-dress or ‘mulch’ with 2-3 inches of additional compost for intensive cropping and heavy-feeding plants.
  • Annual Flower Beds – Mix 1-2 inches compost into top 2-6 inches before sowing seeds. Layer 1/2-2 inches compost on top of soil during growing season. Spread 1-2 inches partially decomposed compost over planting bed during fall clean-up; dig into soil or cover with mulch for winter.
  • Perennials – Layer 2-4 inches of compost on soil and mix in before planting. Add fresh compost mulch annually to surrounding soil surfaces. Dig 2 inch layer of compost into soil 6-12 inches deep around all perennials just outside root zone.
  • Transplanting – Mix small amount of compost into each hole when planting flowers, small perennials and vegetables.
  • Trees & Shrubs – Rake 1-2 inch layer of compost into soil 1-2 inches thick over root area where plant roots are close to or protrude above the soil surface. Cover with mulch. Avoid use of compost and other amendments when planting holes for trees and larger shrubs because the roots may not spread to native soil. Instead, spread 2 inches of compost on soil surface around the plant, water it in, and cover with mulh.
  • Lawns – Spread sifted compost 1/4 inch thick in fall and early spring. For best results, aerate before spreading and rake in after. In most cases applications of compost will reduce need for other lawn fertilizers. Prepare a new lawn by mixing 2-3 inches of compost uniformly into the top 6-8 inches of soil before seeding.
  • Propagation Mix – Mix up to 20% sifted compost with uniform mix of sand, perlite, vermiculite or potting soil for starting seedlings.
  • Potting Mix – Mix sifted compost with equal parts garden soil and perlite or lava rock, in a soiless mix. Use 30% compost, more for moisture loving plants. use sifted compost as a top dressing for container plants.

Variations of Composting

Sheet Composting or Cover Crop – Spread leaves or plant residues over surface of soil or plant winter rye in the fall. Turn materials and growth into soil in the spring.

Compost Tea – Soak compost in water (a burlap bag is useful) to make liquid fertilizer. Use compost tea to water transplants, garden flowers, vegetables, and container plants. Apply to soil or use half-strength as a leaf spray.

Trench or Posthole Composting – Bury garden/yard waste and kitchen waste 12 inches deep in garden. Soil is ready for planting in 2 – 6 months.

Not Sure if You Want to Compost…Yet.

If you don’t want to deal with compost because you want to get a jump on your garden and can afford it, plan on taking a trip to Barne’s Nursery or Corso’s to look for potting soil or soil nutrition amendments. Here is a great article from the National Home Gardening Club that explains the different terms and options that you may be presented with. This can be overwhelming when deciding what is best for your situation, so a guide is useful.

Whatever you choose, your soil needs to be able to support a healthy living micro-ecosystem that will include plants, earthworms, good bacteria and other organisms. If your soil is able to sustain many earthworms, then it’s likely you have excellent life-supporting soil.

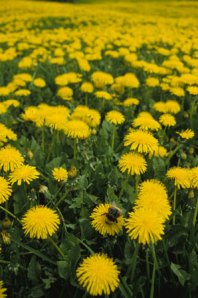
Delicious dandelions attract native pollinators that are essential to the success of your garden.

Delicious dandelions attract native pollinators that are essential to the success of your garden.

Be wary of using petroleum-based chemical fertilizers and weed killers when getting space ready for your garden. Chemical applications can kill off the soil biology; altering the energy cycle with the chemicals being absorbed into your bloodstream, keeping you from benefiting from the essential vitamins and minerals that naturally occur in your fresh food.

What Makes a Weed a Weed?

If you have a yard overtaken by dandelions, make the most of them. Not only do dandelions attract native pollinators (which are of the utmost importance to the success of your garden), but their leaves are delicious in salads. If the blossoms are picked before they go to seed, they can be fermented into a surprisingly tasteful dandelion wine. Also, the roots can be dried and ground into a tea used to treat various ailments. Throw the rest of the plant into the compost pile .

The next installment of the backyard garden articles will include information on seed selection, garden layouts, companion plants and integrated pest management. For more information about Urban Agriculture and food options that will save you money, keep you healthy and build community, visit The Erie Wire and the websites of our partners. We would also recommend listening to Deconstructing Dinner, one of our most celebrated resources for local food security. Listen to this elemental archived broadcast about nature and it’s important role in our survival through what we put into our bodies. 


Why Local Food?

leave a comment »

With the challenge of the changing times, encouraging the growth of a local food system is the best plan for sustaining our community on the north coast of Ohio. The Countryside Conservancy of Northeast Ohio gives several answers to the question “Why Go Local?

Why not? 
Fresh, locally grown foods don’t just taste delicious — they are better for you, your community and your planet.

• Low Mileage from Farm to Plate. Most food travels over 1,500 miles from farm to plate while locally grown food typically travels 50 miles or less reducing pollution, our dependence on fossil fuels, and protecting the environment.

• Fresh Taste, Less Waste. Local food usually arrives in markets within 24 hours of being plucked from the vine or dug from the earth. So, it’s unusually fresh and delicious. Fresher foods keep longer — reducing waste in the kitchen, and providing better value for our food dollar.

• Delicious and Nutritious Food. Because locally grown foods are so fresh, they are also more nutritious, containing higher levels of vitamins, minerals and other nutrients that healthy bodies need.

• Prosperous Farmers. 91 cents of each dollar spent in conventional food markets goes to suppliers, processors, middlemen and marketers; while only 9 cents goes to the farmer. Farmers who sell direct at local farmers’ markets or through Community Supported Agriculture programs keep 80-90 cents of each  dollar. Selling locally, farmers can reduce distribution, packaging and advertising costs and offer us fresher, more affordable food. Prosperous farmers keep farming and operate viable businesses that enhance our communities and strengthen our local food supply.

• Variety: The Spice of Life. Local farmers cultivate mouth-watering varieties of delicious foods like Green Zebra tomatoes, Northern Spy apples, Purple Dragon carrots, Buckeye Chickens, and many other fruits, vegetables, and livestock bred for flavor, nutrients and suitability to our local climate and soils rather than uniformity and endurance to withstand a cross-country road trip. Biodiversity never tasted so good!

• Thriving Communities. Buying local, a greater portion of our food dollar stays home supporting farms and businesses that make up our local communities and our regional economy. Northeast Ohioans spend over $7 billion on food. But less than 1% comes form local farms and producers. Localizing just 10% of our food spending would generate over $700 million for our local economy and communities.

With a dominance of agriculturally-zoned land in Erie County, can you imagine the effect on those of us who live here if everyone replaced even half of their grocery lists with locally grown food? For more information about where the money in Erie County goes, visit our partners at Haag Insight.

Make the most of our harvest vision and support local farmers throughout the year. Roadside stands and Farmers’ markets have fresh surprises that are inexpensive and have become cultural traditions in our community. We look forward to Mulvin’s on 1706 E. Perkins Avenue in Sandusky, the Sandusky Farmers’ Market as well as regional CSA programs. Check back for a more comprehensive listing of local food sources in the coming weeks as we prepare for the 2009 season! Meanwhile, listen here for an explanation about how to support local farmers and consume more nutritious food.

For more information about Agriculture, visit The Erie Wire. We encourage you to visit the sites and businesses of our partners. 

Grow Food From Your Yard, Even if You Don’t Have a Yard.

with 2 comments

Do you ever wonder why the grocery store chains in Ohio sell produce from California, Mexico, Chile, El Salvador, Ecuador, and so on, even though we are able to grow much of the same food right here in our own state? Over 50% of Erie County is zoned for agriculture, and all of it is capable of producing delicious, nutritious food that doesn’t have to travel thousands of miles to get to your dinner plate. Due to minerals deposited by the glacier that formed the Great Lakes 10,000 years ago, this part of Ohio has some of the most nutrient-rich soil in North America giving us a combination of loamy soils, which are considered great for specialty food crop production. Erie County is also located in what is known as a fruit belt. Although we can have very cold, snowy winters, the lake effect moderates seasonal temperatures by absorbing heat and cooling the air in summer, then slowly radiating that heat in autumn, giving us a consistent temperate climate through much of the year. This allows us to grow a variety of fruits and other warmer climate crops with large-scale success. Imagine harvesting the following fruits and vegetables that you grew yourself.
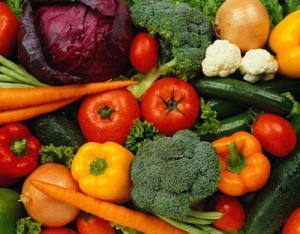
Grow it yourself!

Grow it yourself!

tomatoes, squash, peaches, broccoli, celery, pears, peppers, lettuces,

sweet corn, onions, herbs, spinach, cauliflower, garlic, zucchini, apples,

pumpkins, grapes, beets, melons, plums, carrots, beans, cabbage, peas,

grain, berries, eggplants, radishes, cucumbers, potatoes, sunflowers and more.

Seeds are an inexpensive investment, water is everywhere, and the sun is free. Keeping a food garden, even in the city, can save you money and keep you healthy.


Are you afraid of starting your own garden because it seems to be too big of a challenge? The Container Gardening Blog offers some words of encouragement:

“You may think you haven’t a clue about growing vegetables. But the truth is that you can easily learn enough to be growing useful crops in quite a short time span, and each session spent in your garden teaches you something new. You will learn much that is unique to your own situation, such as local soil conditions, your particular aspect in relation to the sun, and oddities that relate to your local microclimate. You will learn most of this by getting out and giving it a go. Without question the taste of homegrown vegetables is vastly superior to that of the commercially grown produce. Have you heard people complain that [store-bought] tomatoes no longer have any taste? [Flavor is a good indicator of how fresh and nutritious the food is]. They will when you grow your own – you will never taste better. The lack of taste with the commercial crop is not all the fault of the growers, as they are under pressure to produce a crop, of uniform size and color, to the schedule of the wholesale market, and ultimately the supermarket. [This kind of emphasis on quantity crops produces food made for shelf life instead of on quality, nutrition and freshness.] When you grow your own vegetables, you set the schedule.”

There are many ways to turn your yard, front or back, large or small, into a beautiful, rewarding garden. Late winter is the perfect time to start planning a good layout and preparing for the plants you are going to grow. Knowing how the sun moves across different parts of your yard will help in your decisions.

If you are utilizing a small urban space for vegetable growing, it is in your best interest to use raised beds. Raised beds can be kept in a garden box you can build yourself. Click here for another website that offers a guide on how to build one. Using wood, cinder blocks, bricks, or other recycled materials to create the frame of the garden box makes this an inexpensive option. Here is a raised bed layout for a productive vegetable garden about the size of a parking space.
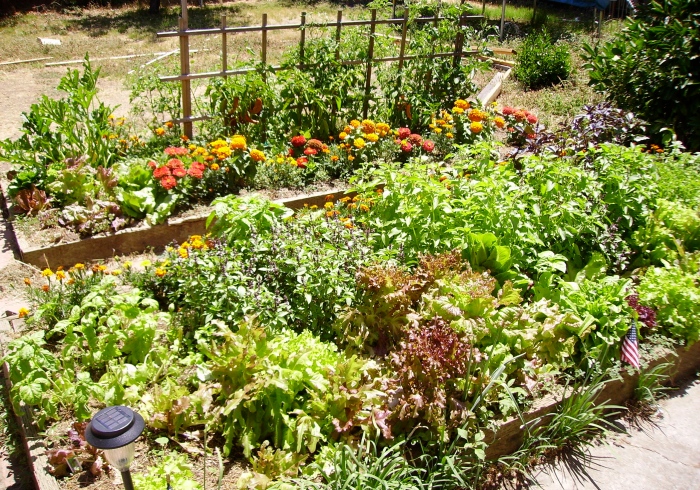
Raised bed vegetable garden

Raised bed vegetable garden

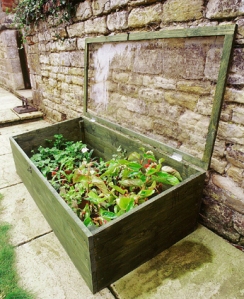
In  order to make the most of the seasons, you can turn smaller garden boxes into cold frames during early winter and early spring. A cold frame is simply a small to medium garden box with a clear glass or plastic lid that will create a microclimate with sunlight, allowing for the soil to stay warm enough for seeds to germinate and plants to grow. For more information on cold frames, click here. If you are eager enough to start your garden before the last frost, visit here for some excellent suggestions.


Cold frames and other early season methods give you more!

Cold frames and other early season methods give you more!


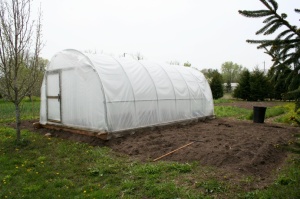
If you have enough space and are feeling ambitious, you can make your own hoop house inexpensively. This is a makeshift greenhouse that, although unheated, will provide protection against wind, frost, and excessive rain while giving the plants inside it extra warmth during the daytime, extending your growing season. Westside Gardener is an informative site that offers a shopping list and a step-by-step guide on parts and assembly instructions for a 21’ x 10’ hoop house that will stand 7’ tall. Simply visit your local hardware store, show them the list of supplies and they ought to be able to give you pricing information on the materials. If you are interested in building one, check out the following Kitchen Gardener and Hoop Benders for more information and resources.

Building your own hoop house is relatively inexpensive

Building your own hoop house is relatively inexpensive


There are also many clever ideas for using containers when organizing a small space garden. Vertical gardening using grow towers and grow ladders are excellent for small boxed herbs and strawberries while trellises, arches and fences are helpful when growing vine plants and hanging garden baskets. For inspiration on vertical gardens and garden walls, visit here.


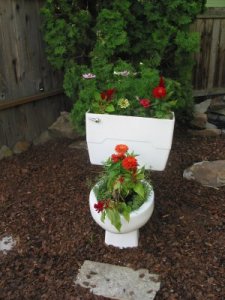
If you are on a tight budget, using old junk in a different way can be a thrifty, creative opportunity to give your garden some character. An article in Northern Gardening suggests cleaning out your garage, attic, or basement to see what items you can give new lives to instead of sending to the landfill. Once you start thinking like this, you won’t ever look at old stuff the same way again.

Get creative with your old junk!

Get creative with your old junk!

At every rummage sale and flea market, you’ll find yourself thinking about what you could do with various things you see. Old railings and ladders can be turned into fences or trellises. Drawers can become planters or small garden boxes – be sure to add a few drainage holes. Cabinet doors can be put together to form wonderful bottomless garden boxes. You can coordinate them with paint, making them all one color or leave them as they are to make a statement. A note to remember: If you are going to paint, you should use plant-safe materials. Ask at a good paint center and they should be able to tell you which products are non-toxic to plants and people. Look for the VOC-Free label.

Don’t have a yard? There are many ideas for roof top gardens if you are in a building with a flat roof and are in need of space. This article on Daily Kos not only gives excellent starter advice for roof top gardens but also some more money-saving blueprints for space efficient containers.


There is the option of community and neighborhood gardens to provide nutritional and social advantages, allowing for the possibility of food to be made available to everyone, even low-income housing residents. Organizing a space, so that anyone who participates will receive an equal share, provides a golden-rule opportunity for individuals to help themselves while helping others. Recent developments in western and northern Philadelphia have proved the success of this concept.
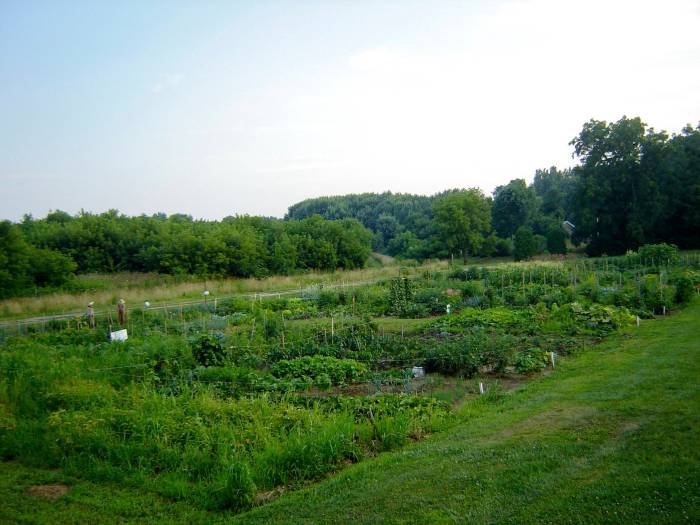
Grow a garden, even if you don't have a yard!

Grow a garden, even if you don't have a yard!

The Erie County Metroparks have a foodbank at Osborne park, sponsored by the Erie County Men’s Gardening Club. For a small fee of only $20 a year, you have access to a 20×20 plot of land to grow whatever you’d like, just as long as it is maintained and no chemicals are used: such as petrol-based fertilizers, weed killers and other pest controls. These harmful chemicals can destroy the essential biological structure of the soil and leech into the waterways, causing accidental environmental damage and posing a potential health risk to people who are exposed to them regularly.


This article is the first of a series, so check back for the next installments that will outline preparation for soil quality, composting, seed options and integrated pest management.


For more information about Urban Agriculture and food options that will save you money, keep you healthy and build community, visit The Erie Wire and the websites of our partners.